
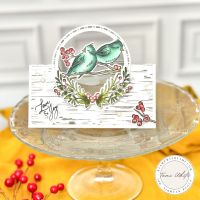
STIPPLED ROSES CIRCLE WREATH CARD
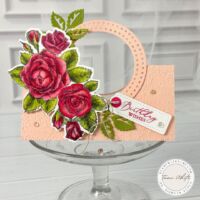
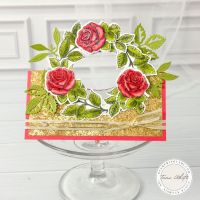
Welcome to a world of creativity and elegance as we delve into the enchanting realm of handmade cards. In this tutorial, we’ll explore the breathtaking beauty of the Stampin’ Up! Stippled Roses Stamps and Die bundle, unveiling a stunning “Wow” impression with a fancy fold card. Prepare to be captivated by the exquisite craftsmanship and artistic flair that goes into creating this masterpiece.
The Artistry Unveiled:
The focal point of this card tutorial is the mesmerizing Stippled Roses stamps, meticulously colored with the rich hues of Stampin’ Blends Markers. Each stroke brings the roses to life, creating a symphony of colors that evoke a sense of awe and admiration.
Instructions:
Dive into the creative process by following the detailed instructions provided in the tutorial. The step-by-step guide will walk you through the Circle Wreath fold technique, unraveling the secrets behind this unique and eye-catching card design. Whether you’re a seasoned crafter or a novice, the instructions cater to all skill levels.
Video Insights:
For a more immersive experience, check out the accompanying videos under the “Instructions & Videos” tab. Witness the magic as the roses come to life through the coloring process, and gain visual insights into the Circle Wreath fold technique. Let the videos be your guiding companions on this artistic voyage.
Series Showcase:
This card tutorial is just a glimpse into a set of three stunning cards created with the Stippled Roses stamps. Explore the entire series by clicking on the tab below, where each card unveils a new dimension of creativity and craftsmanship. Elevate your card-making skills and discover the joy of creating handmade masterpieces.
As you embark on creating this exquisite Circle Wreath fold card, let your imagination run wild, and infuse your unique touch into each element. The Stippled Roses stamps and the Circle Wreath fold technique are not just tools; they are gateways to a world of limitless creativity. Enjoy the journey of crafting, and may your cards bring joy and wonder to those fortunate enough to receive them. Happy crafting!
INSTRUCTIONS PDF ⬇
The instructions include measurements and step by step directions to create this card. There is also a clickable supply list.

HELPFUL VIDEOS ⬇
CIRCLE WREATH CARD VIDEO
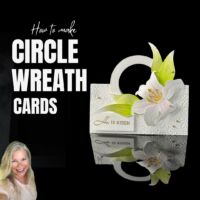
On the video I’ll share how to make the circle wreath card fold.
COLORING THE ROSES WITH THE STAMPIN’ BLENDS
On this Stampin’ Scoop Show I shared how I colored the roses using the Stampin’ Blends Markers.
STAMPIN UP MATERIALS I USED
CIRCLE WREATH SERIES

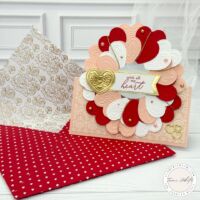
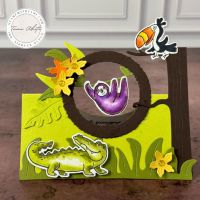
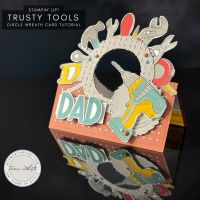
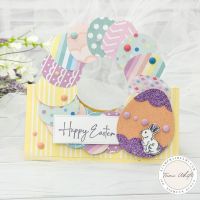
Click the thumbnails below for more free tutorials in my series.
CATALOG DETAILS
Explore the Wonderful World of Stampin’ Up!
Welcome to the vibrant universe of Stampin’ Up!, where creativity knows no bounds and every project is an opportunity to craft something beautiful. I’m thrilled to be your Stampin’ Up! Demonstrator and gateway to this enchanting realm of stamps, inks, papers, and more! Dive into our catalogs and more to discover a treasure trove of possibilities waiting to be unleashed.
Prefer flipping through pages instead of scrolling screens? Of course you do and I’ve got you covered! Here’s how to snag your hard copies:
- Place an Order in the Online Store: One of the simplest ways to receive a hard copy of the Stampin Up catalog is by placing an order in my online store.
-
- With each new catalog release I will automatically send a complimentary hard copy of the catalog to anyone who has placed an order within the past 6 months.
2. Join my VIP Members Online Club: As a VIP member, you will automatically receive complimentary hard copies of the catalog with each new release. As well as all of the bonus perks membership offers.
- Join as a Demonstrator: If you’re passionate about crafting and want to take your hobby to the next level, consider joining Stampin’ Up as a demonstrator. Here’s how it can benefit you:
-
- Demonstrators receive complimentary copies of each new Stampin Up catalog directly from the company.
- Enjoy exclusive discounts, early access to new products, and opportunities to connect with fellow crafters.
- Share your love for crafting with others and earn income through sales and commissions.
4. Lastly, you can click the “Buy now” button above to order your hard copy from me.
US Shipping Only. Please allow 2-1/2 weeks for delivery.
CURRENT STAMPIN UP CATALOGS

Annual Catalog
May 6, 2025-May 4, 2026

2025 September – December Mini
September 3 – January 5
MORE PRODUCT LINES
Online Exclusives PDFS
Catalog companions, download the PDFS for each Online Exclusive Release.
Description for this block. Use this space for describing your block. Any text will do. Description for this block. You can use this space for describing your block.
CURRENT SPECIALS
PHOTOS


Want to save these ideas for later? Pin them to your favorite Pinterest board.
Have you tried these designs? I love to see your creations! Be sure to share them on #shareyourcrafts post every Saturday on my Facebook Page
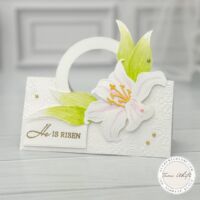




Love both the Easter Lilly & Stippled Rose Wreath Circle Cards. Thank you for the instructions & Video. I have the Everyday details dies but I can’t get the out side circles to cut like the sample cards with 2 rings of holes. What am I doing wrong. Thank you.
(every card you make is Outstanding. A true work of Art)
Thank you so much for your kind words! I’m thrilled to hear that you love both the Easter Lily and Stippled Rose Wreath Circle Cards, and I appreciate your compliments on my work.
Regarding the issue you’re facing with the Everyday Details dies, I’m here to help. To achieve the two rings of holes on the outside circles, you can use the two largest circles from the Everyday Details dies. Place them one inside the other and run them through your die-cutting machine simultaneously. This will create the ringed frame. If you haven’t had a chance to catch the video tutorial, I demonstrated how to cut the circle frame this way just using the Stylish Shapes circles instead of the Everyday Details.
I hope this tip resolves the challenge you’ve encountered. If you have any further questions or if there’s anything else I can assist you with, please feel free to ask. Thank you again for your support and happy crafting!