
TEALIGHT CARD SERIES #1
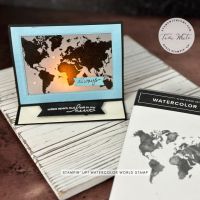
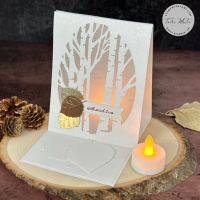
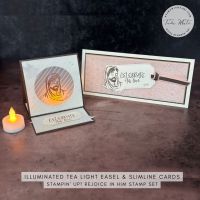
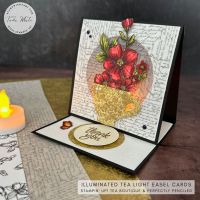
Light up someone’s day with a glowing tea light easel fun fold card! On this video class I’ll share how to make these with the Stampin’ Up! Watercolor World Stamp Set.
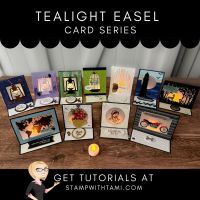
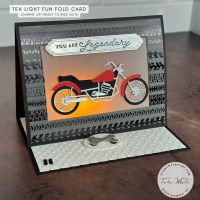
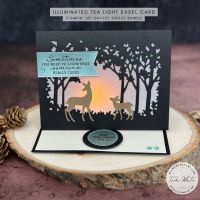
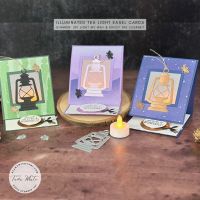
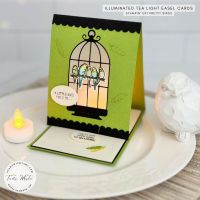
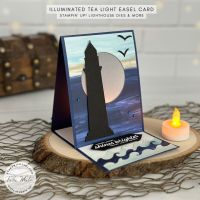
This is the last installment of my Watercolor World mini series of card tutorials and the beginning of a new series of Tealight Easel Cards. I’ve created an entire series of illuminated Tea Light Easel Cards in a variety of occasions and sizes. I’ll share them all on the video and I have links to the tutorials below.
Scroll down for:
✅ ILLUMINATED EASEL CARD VIDEO
✅ INSTRUCTIONS
✅ TEA LIGHT SERIES
✅ PHOTOS
✅ STAMPIN’ UP! SUPPLIES
✅ BATTERY OPERATED TEA LIGHTS
✅ GIVEAWAY
✅ MORE FROM THE NEW 2023 MINI CATALOG

TEALIGHT CARD SERIES VIDEO
ILLUMINATED EASEL CARD VIDEOS
I’m so sorry, I got kicked off the internet part way through the class and had to start a new video. I combined both videos:
TEA LIGHT SERIES
Click the photos for each tutorial in the series that has been released. I’ll be posting the rest of these tea light easel card tutorials over the next couple of weeks. Stay tuned for more.
PHOTOS
Want to save these ideas for later? Pin them to your favorite Pinterest board.
Have you tried this design? I love to see your creations! Be sure to share them on #shareyourcrafts post every Saturday on my Facebook Page.

These cards are just as pretty in the dark as they are in light. I used Battery Operated Tea Lights, I have links below to a few different options for Tea Lights on Amazon. Regular, timers and even color changing!

The Watercolor World example I demonstrated on the class video is a landscape style easel card. I have the dimensions listed on the printable pdf above. I’ll share other orientations like portrait and square in the upcoming tutorials for the series.

This is the top down view of the card opened fully. I am going to show a trick on the video on how to hide the vellum backing so it doesn’t show. This was my original and I didn’t think to hide the backing until I’d already assembled it.

This is what the card looks like when it’s folded. Folded card size is standard 5-1/2″ x 4-1/4″ and will lay flat to fit in a regular Medium sized envelope. However if you are gifting the Tea Light with the card I’d recommend a bubble wrap envelope.

Yesterday I shared a tutorial for you to make these gorgeous Watercolor World easel cards.
Click here if you missed it.

My mini series of cards featuring the Stampin’ Up! Watercolor World stamp. Click here for a video and instructions for the rainbow map card set.
PRODUCTS USED
STAMPIN’ UP! SUPPLIES
BATTERY OPERATED TEA LIGHTS
24 Pack of Tea Lights
24 Pack of Tea Lights with Timers
50 Pack of Tea Lights
Color changing Tea Lights
GIVEAWAY
Youtube and Facebook and leave a comment. No purchase necessary.




i love your workand really enjoy your videos look forward to seeing more
Thanks for watching and being a part of my stampwithtami community!!
Love them all!
Thanks!
These r such pretty cards and your explanation made it so easy to recreate. Thank u for making the card come alive😊
You are so welcome – I’m thrilled that it was easy for you to follow. Maybe you’ll make one?
Amazing tutorial and video…your energy is contagious! I love easel cards, but these are so over the top beautiful. Shared the video & post with my stamping sister Mary.
My fave of all the choices(do I have to choose?) is the By the bay with the light house. Dont have that paper yet but will try the landscape design with another product.
Thanks for all your inspiration and gracious tutorials.
Sue
Thank you so very, very much, Sue!
#stampitcontest. OMG Tami I have seen each and every one of your card tutorials and I am amazed on your creativity. You have so much talent. Thank you for sharing all this amazing inspiring ideas!
Wow – I appreciate YOU so much Lizzy!
Beautiful! Thanks for sharing your designs. #stampitcontest
My pleasure!
I absolutely love your light up cards, I cant wait to get started.
Thanks, Dolly. Have fun!
Oh my….gorgeous cards!
Oh my….gorgeous cards! And thanks for combining into one tutorial video!
How fun and
pretty these cards
are! Love the lights
in them.
Carla from Arizona
Thanks, Carla!
Hi! Tami, I am watching this video late as I have just got it in my in box today, but I have been wanting to make this illuminated Easel card but didn’t know how to make it. So happy I saw this video as I want to make the Grassy Grove one, as I have that bundle. Your instructions are so easy to follow and all your cards are beautiful. Thanks so much for sharing. I can’t wait to make these.
Joan
Wonderful – have fun and make more than one!