Archives for January 2018

ONLINE CLASS & VIDEO: How to create a Sliding Barn Door Card – Part 3

CARD

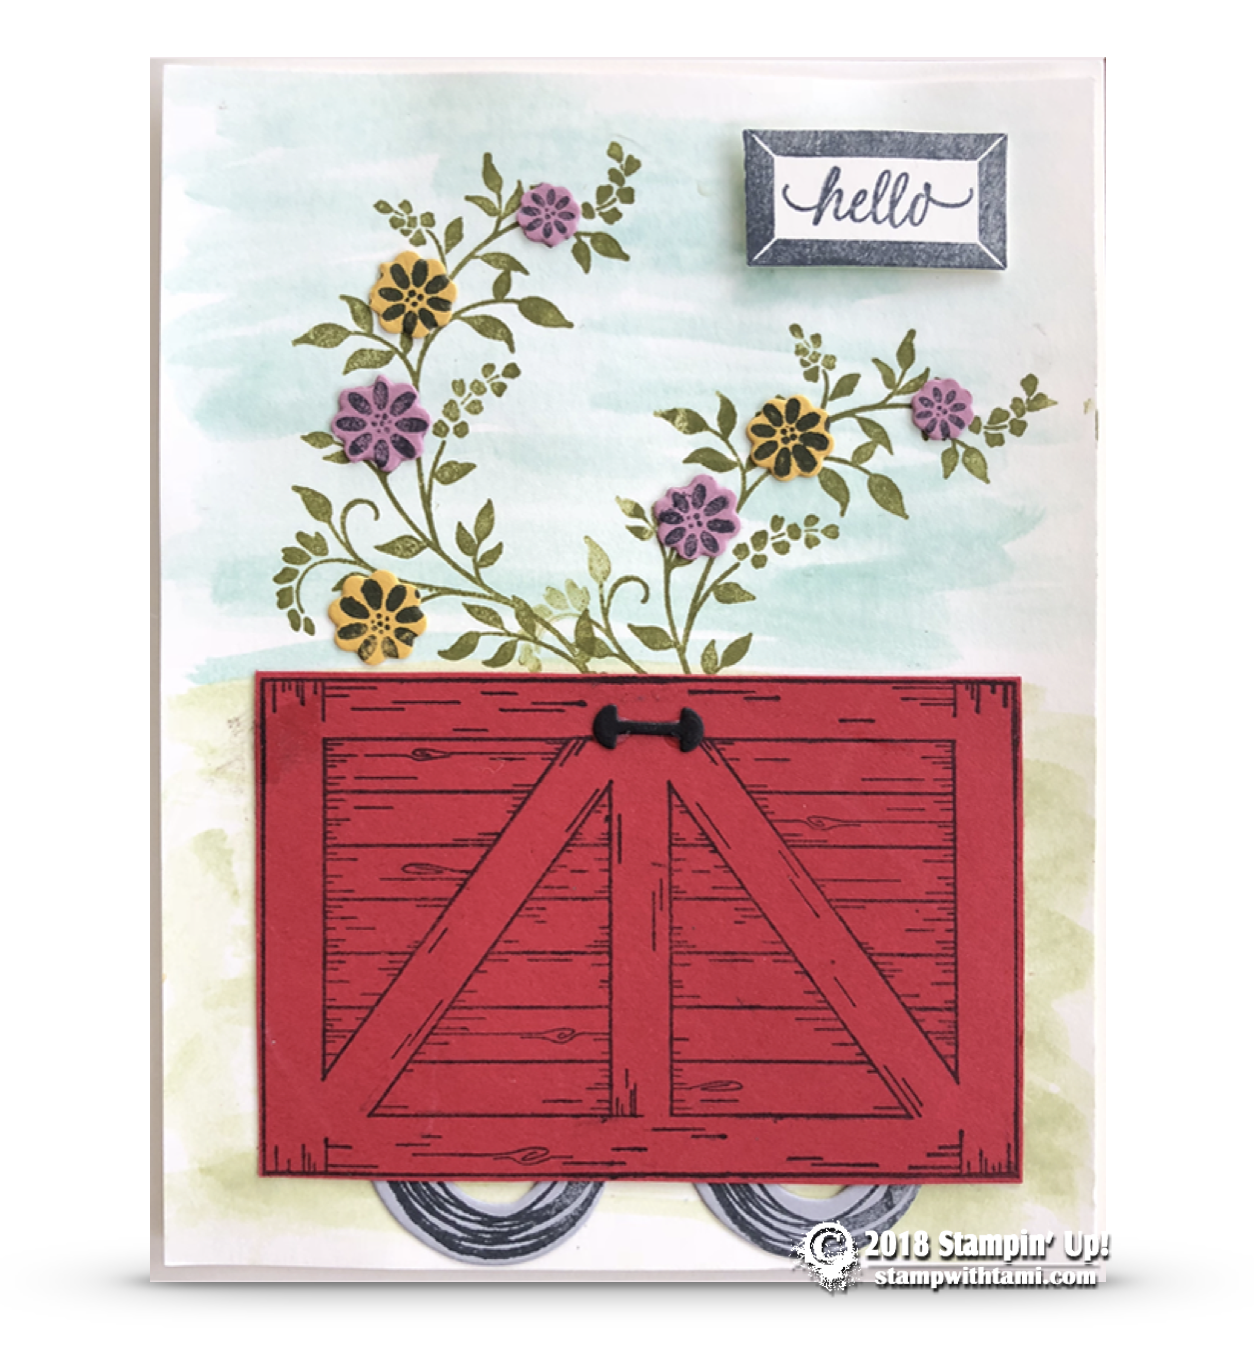
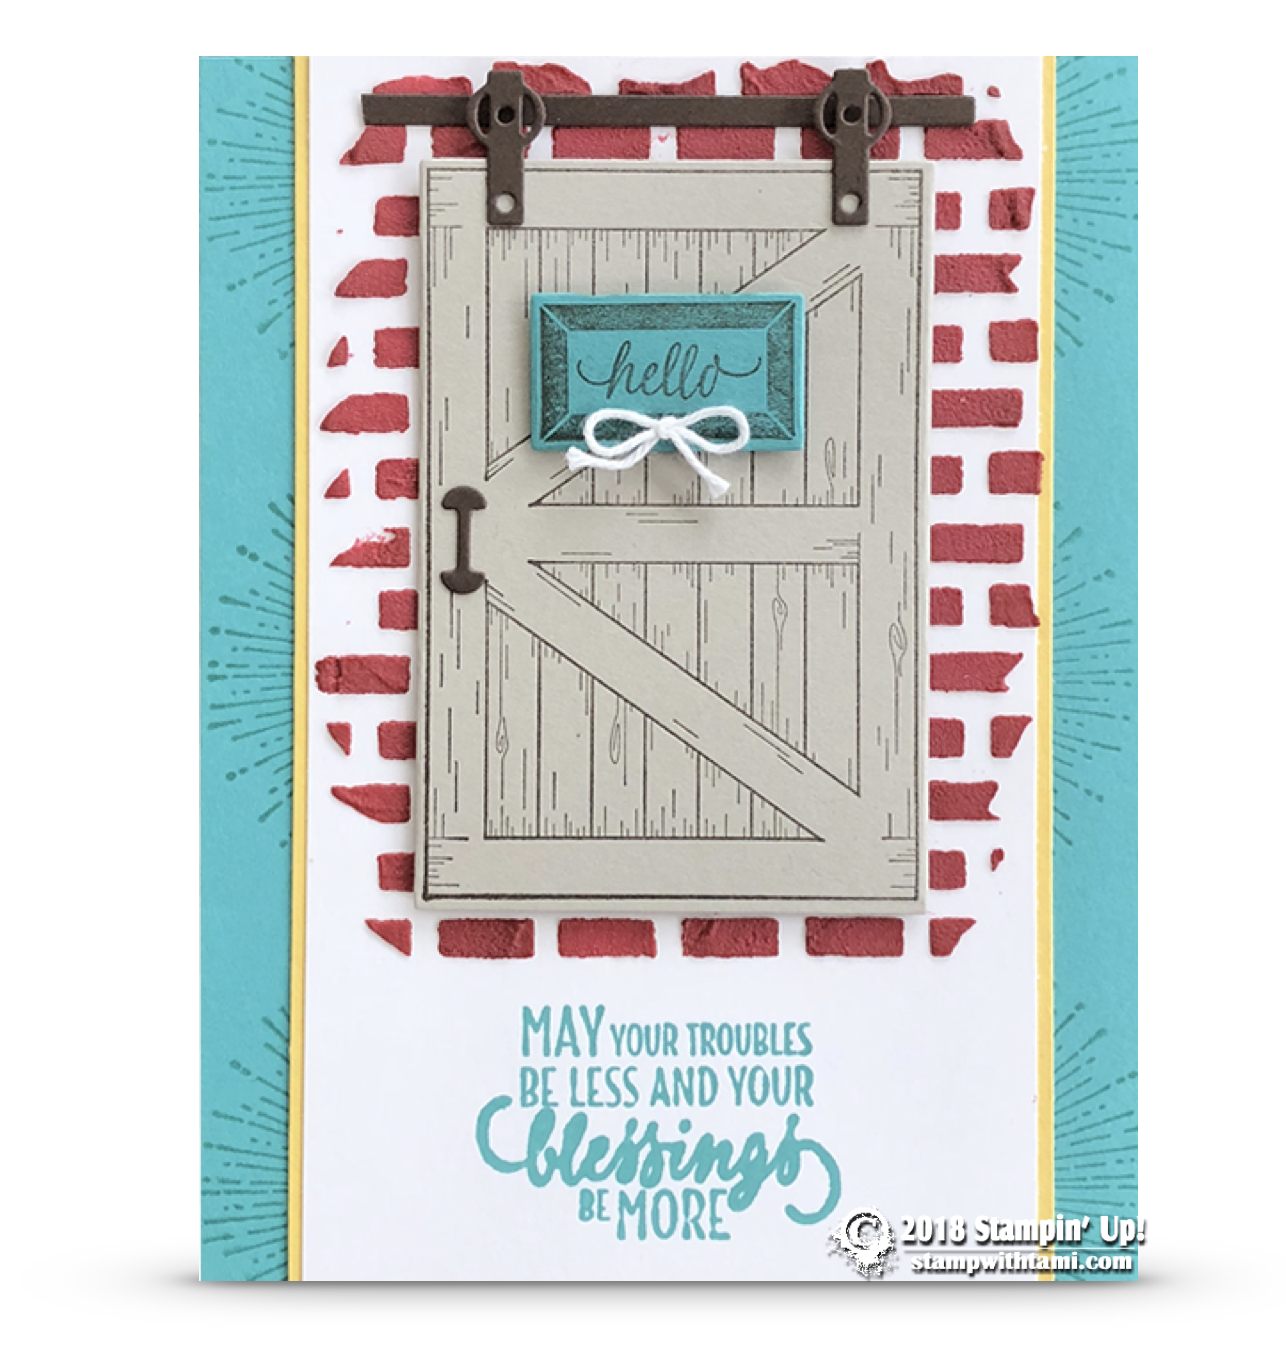
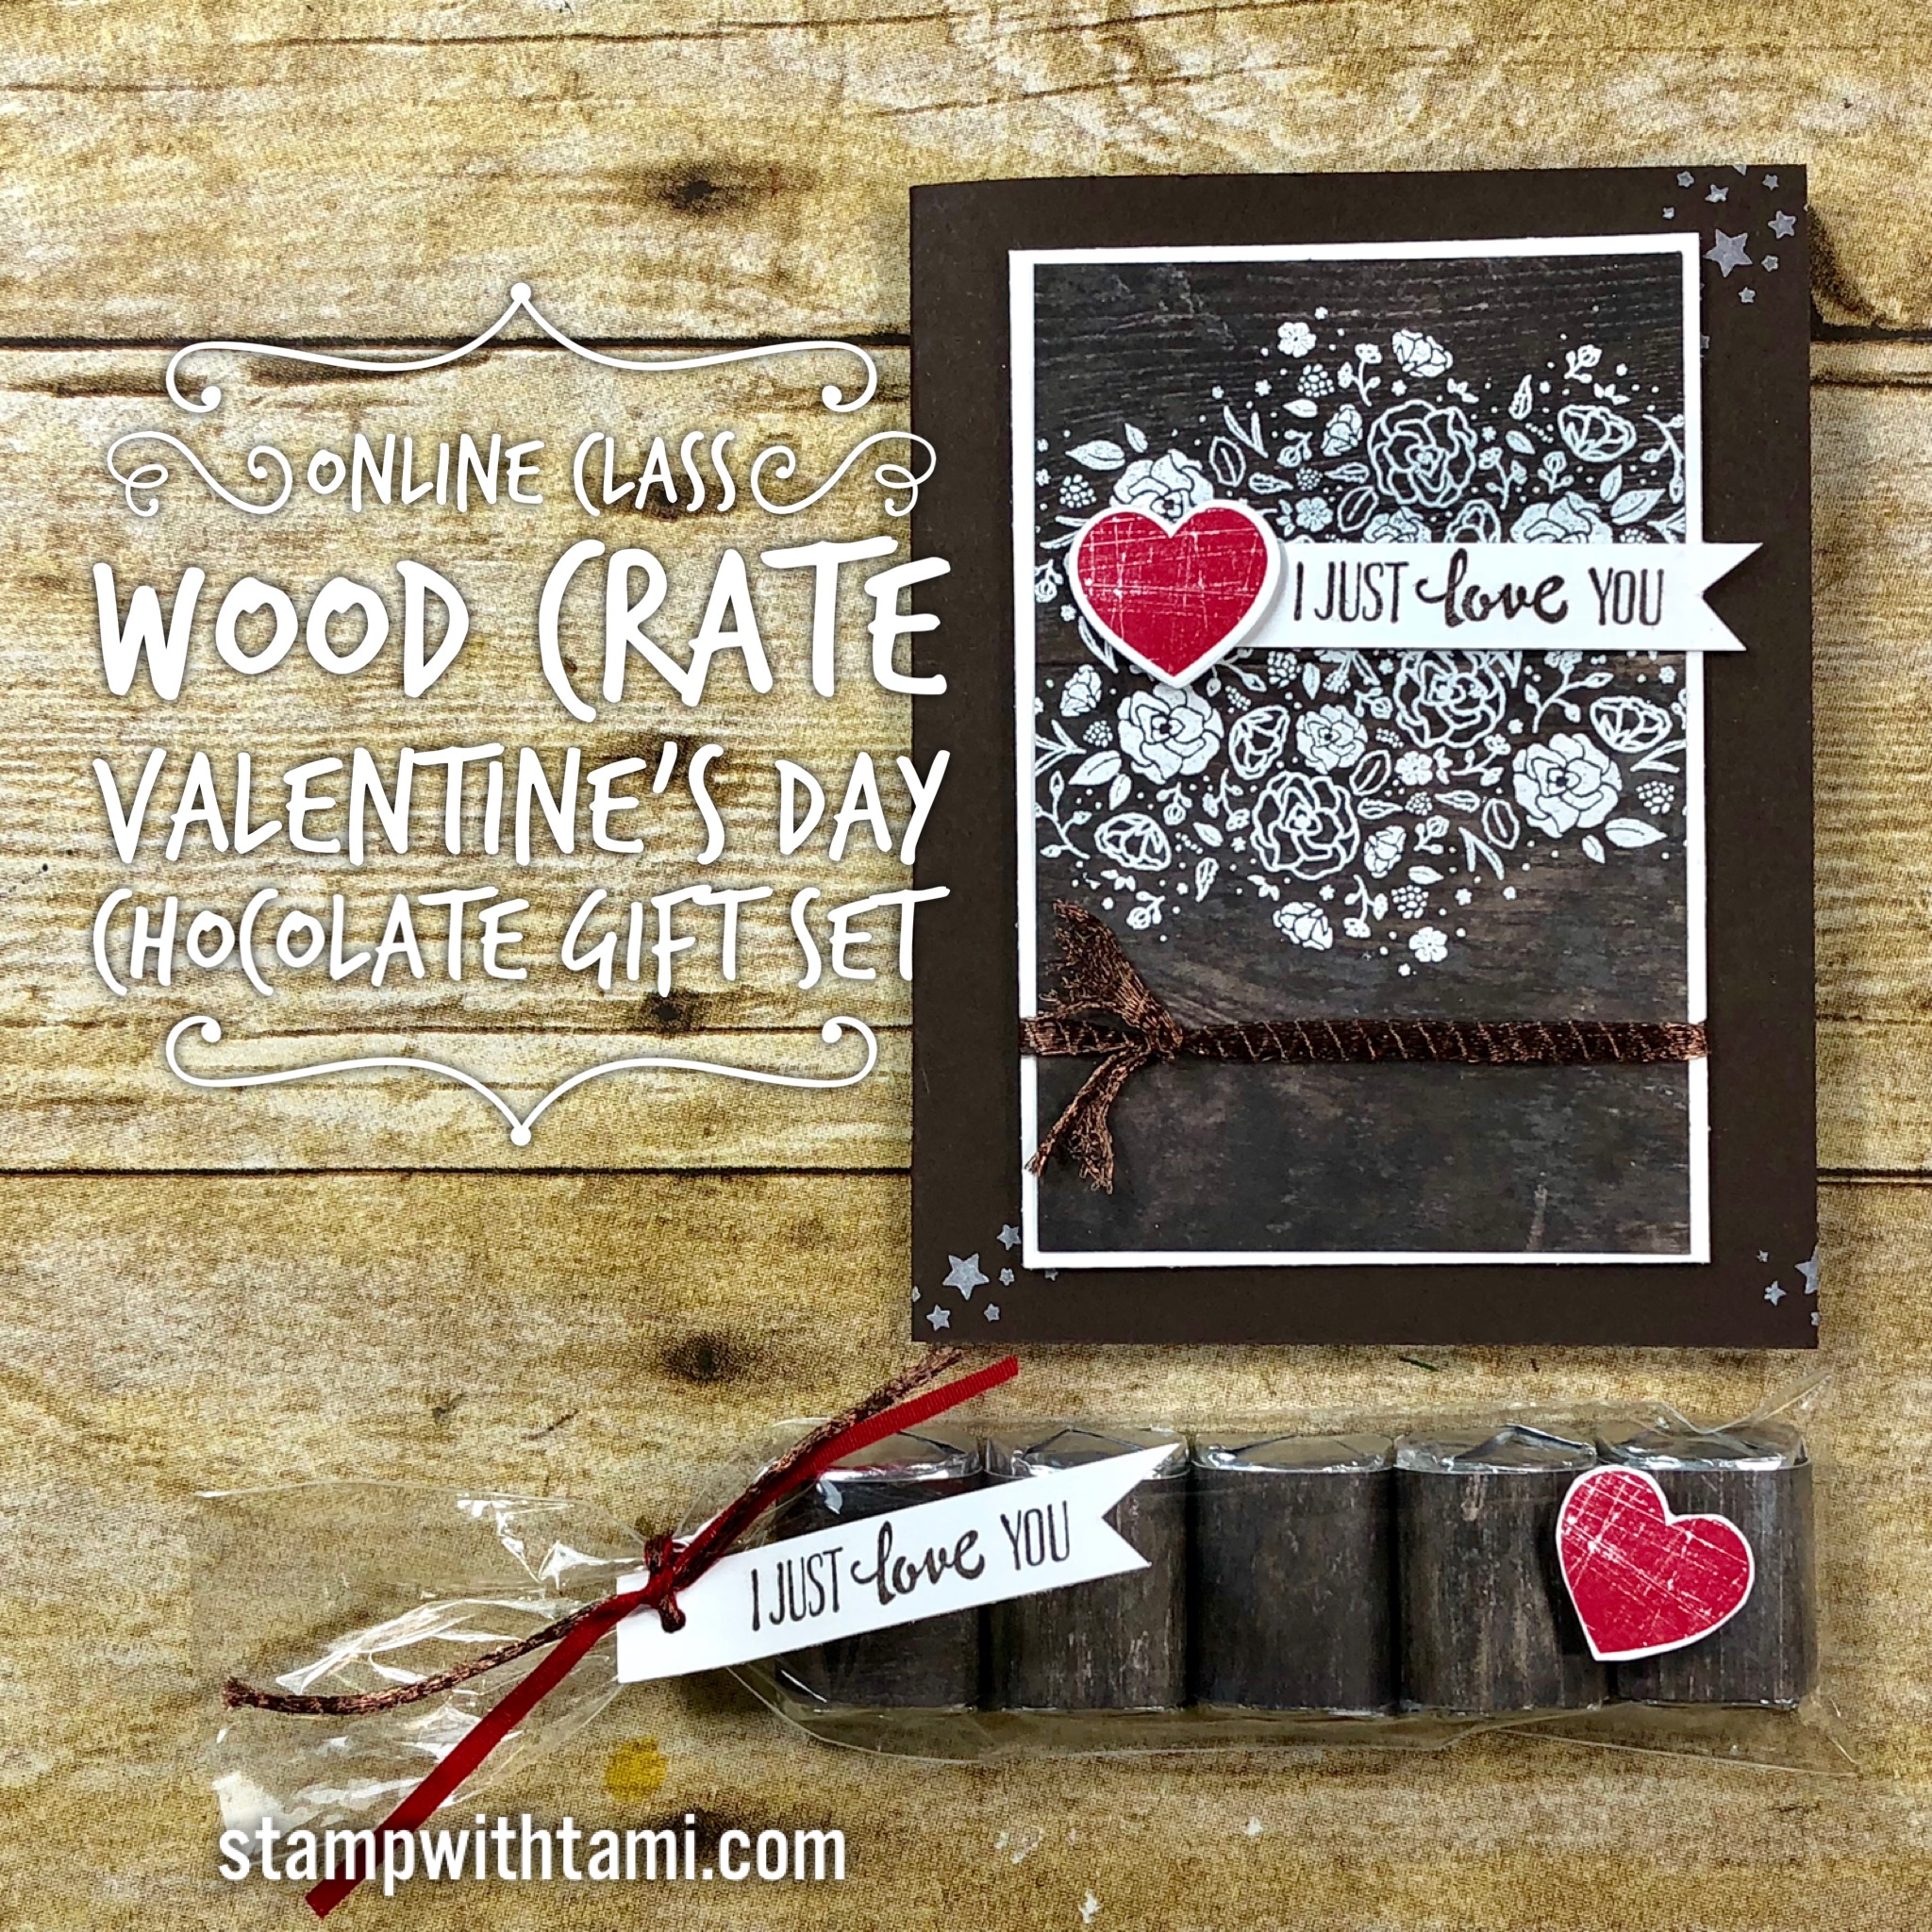
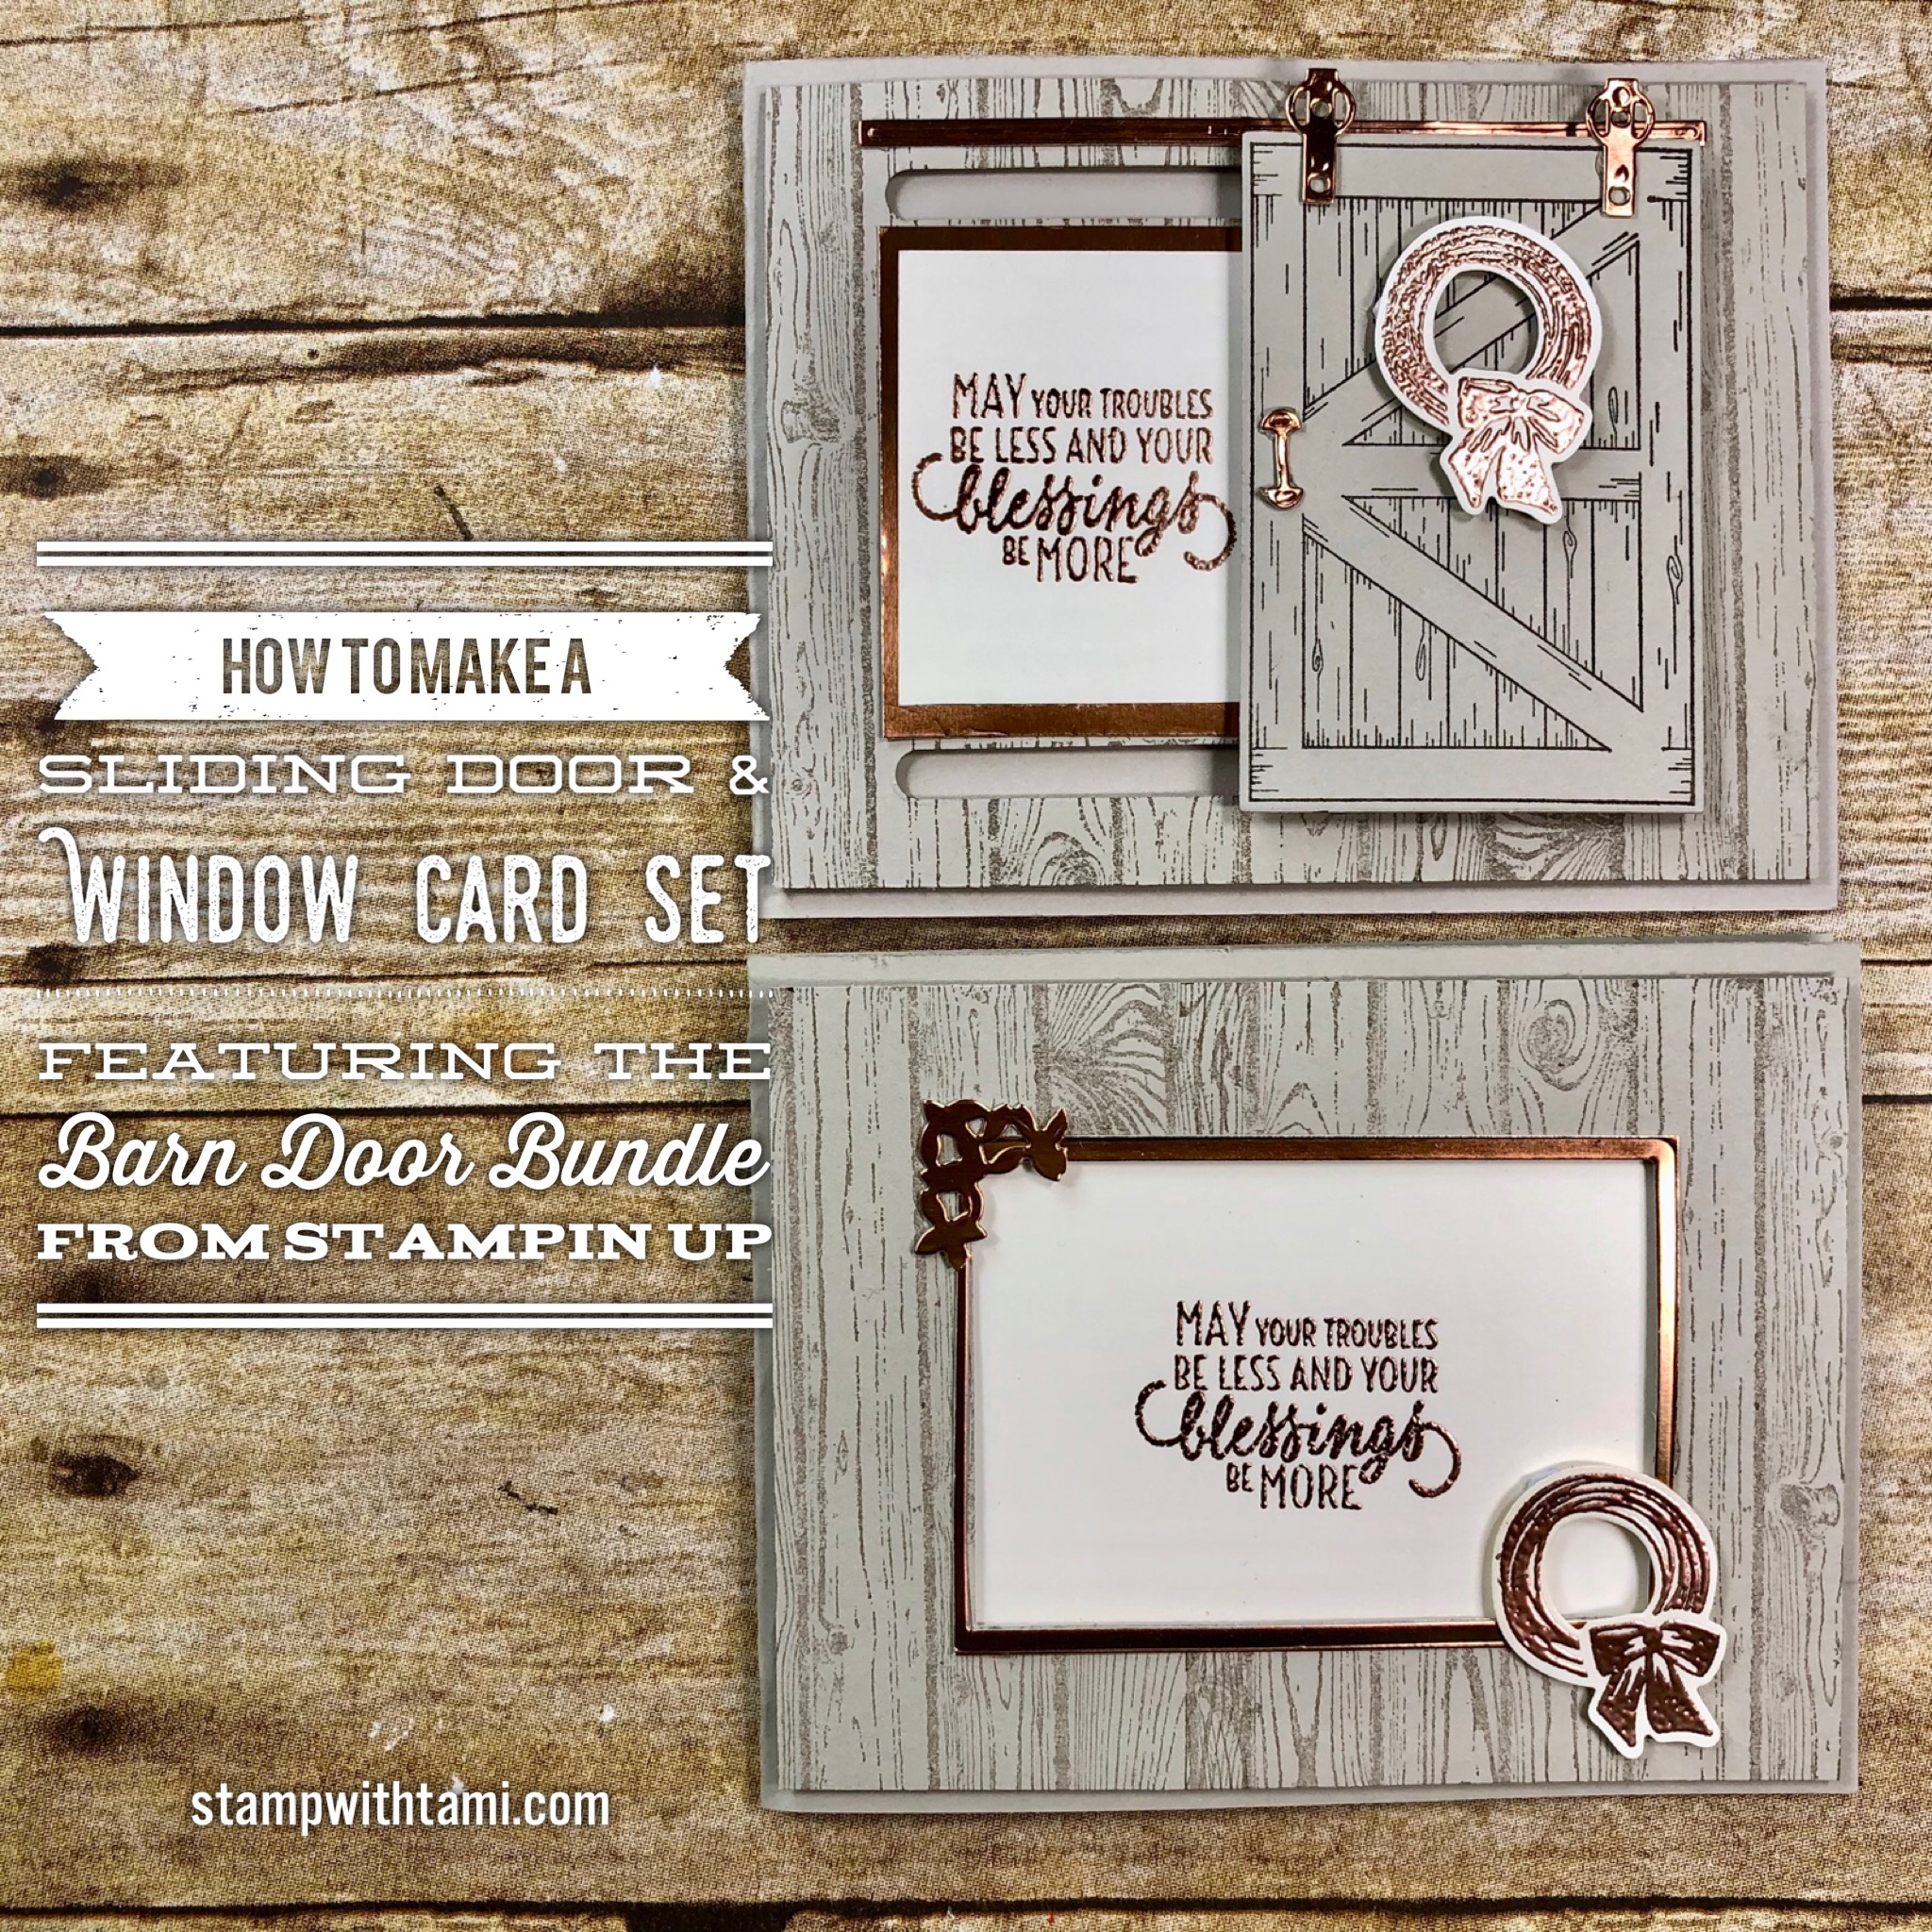
On today's online class, I'll show you how to make this awesome Sliding Door card and Window card set. Both feature the Stampin Up Barn Door stamp set and Sliding Door dies. The background was created with the Hardwood Stamp. We'll also be heat embossing with my favorite...copper!!! Soooo classy, I can't wait. Techniques include:
  • Sliding Door Card
  • Window Card
  • Heat Embossing
I will be live at noon today on my Facebook Page demonstrating these cool techniques. If you miss the live broadcast, you can catch the replay below (or on my Facebook & Youtube). Download the free pdf below, for measurements and the supplies list.  

CARD: Adorable Wagon Card from Barn Door Bundle Series – Part 2

CARD

Going "outside the box" with Part 2 in my series on the Stampin Up Barn Door Bundle. Using the door to create this adorable wagon, and the wreath image and die to make the wheels for it. The floral arrangement in the wagon is a combination of the Hold on to Hope Stamp Set (leaves) and the flowers from the Barn Door bundle (wreath). The background is a watercolor wash.

CARD: Blessings from the Barn Door Bundle Series – Part 1

CARD

I'm beginning a new series of ideas featuring the new Stampin Up Barn Door Bundle. Part 1 is a fun card created by Jessica Scott. It features the barn door over a brick wall made with Embossing Paste and the Pattern Party Decorative Mask. How do I make it? Mix emboss paste with Cherry Cobble ink refill and apply over Pattern Party Decorative Mask (See video below for directions). Stamp the barn door and sentiment in Bermuda Bay ink. Stamp the sign in Early Espresso ink on Bermuda Bay card stock and trim out. Stamp and cut the Barn Door from Sahara Sand using the Sliding Door dies. Assembly: Assemble the card with Snail Adhesive, using Dimensionals on the door and Mini Glue Dots on the hardware.

CARD: Sending Hedgehugs Your Way Card

CARD

This little hedgehog card from the Stampin Up Hedgehugs stamp set is so stinkin' cute I can't stand it. I love him sitting on this little Myths & Magic Specialty DSP collection. The "grass" was created by stamping the Burlap stamp in Old Olive ink on Old Olive card stock, then cutting a wave in the top to give the effect of hills. The words were cut with the Stitched Shapes dies.

CARD: And They Lived Happily Ever After Card

CARD

"And the lived happily ever after" wedding card from the new Stampin Up Love You Still stamp set. The flowers and window sill are colored with ink pads and Blender Pens. The words are cut from the Stitched Shapes dies. The vellum overlay is from the Sweet Soirée Embellishment Kit. Layered over some DSP from Petal Garden and Wood Textures collection. A Delicate Doily and some Fresh Fig ribbon complete the card.

ONLINE CLASS & VIDEO: Valentine’s Chocolate Gift Set from the Wood Texture Bundle

CHOCOLATE GIFT SET

This is a yummy non-traditional Valentine's Day Gift set: Card and matching package of Hershey Chocolate Nuggets. These were created with the Stampin Up Wood Words bundle, stamp set and Wood Crate framelits dies. It also features the coordinating Wood Textures Designer Paper and Copper Trim. All from the Wood Textures Suite in the Annual Catalog. The card features heat embossing with White powder. The chocolates are packaged in a Stampin Up 2"x8" Cello bags. The card design came from Kim Gavarra. I will be live at noon today on my Facebook Page creating this fun Valentine's day gift set. If you miss the live broadcast, you can catch the replay below (or on my Facebook & Youtube). Download the free pdf below, for measurements and the supplies list.

CARD: Congratulations You Couldn’t Be More Amazing

CARD

"Congratulations - You Couldn't Be More Amazing" from the Stampin Up Amazing Congratulations stamp set. This set was created so you can stamp a multi-colored brushstroke effect (see instructions below). The "congratulations" is stamped in 2 ink colors: Berry Burst and Sweet Sugarplum. Then layered over some bright and cherry Tutti-Frutti Designer Paper. The matching Berry Burst sequins are from the Tutti-Frutti Adhesive backed sequin collection.

The Stampin Scoop Show – Episode 47 – Valentine’s Day

THE STAMPIN SCOOP SHOW – Episode 47

Valentine's Day January 23, 2018 After a few reschedules last week (thank you for your patience) we were finally able to share our Valentine's Day projects with you on today's Stampin Scoop Show. We featured the Stampin Up Painted with Love Suite. Below (and on the video) are some great projects. Flash the beagle makes a few guest appearances throughout the show today as he shows his thanks for all the love and prayers you sent last week.

CARD: Life is so Much Better Card from the Patel Palette Series – Part 6

CARD

Today's card is part 6 in my series on the Stampin Up Petal Palette stamp set and Petals & More dies. It's a beautiful color combination. The Rich Razzleberry and Old Olive Stampin Blends bring this to life. The Glitter Enamel dots and Pear Pizzaz Shimmer ribbon are not only yummy, they are the perfect accent. How do I make it? Stamp the words in Sweet Sugarplum ink on Whisper White scrap. Using Memento Tuxedo Black ink, stamp the flower image on Whisper White Scrap paper. Color the flower with the Stampin Blends markers. (Click here for a video on how Stampin Blends Markers and how to use them). Using the Big Shot Die Cut Machine: Cut the flower and oval. Assembly: Assemble the card with Snail Adhesive, using Dimensionals on the oval panel and the flower panel. Attach Glitter Dots. Measurements: Basic Black Card Base = 8-1/2" x 5-1/2", Basic Black Card Stock = 5-1/2" x 4-1/4", Petal Passion DSP: 5-1/4" x 1-1/2", and Whisper White scraps.

FREE SHIP + SALE-A-BRATION – Flash Sale 6 Days only ends January 26

FREE SHIPPING

Sunday, January 21 - Friday, January 26 only Orders over $50 (email only) Offer valid through Tami White Earlier today I announced that I'm on the edge of the most exciting milestone in my Stampin' Up! Career. I want to bring you all on this journey with me. I'm kicking off my "Countdown to $2Million" with the best offer, a Free Shipping Flash Sale. Combine with all other specials. All orders must be placed via email to qualify, details on how to order are below.

NEWS: Let’s Make History! Countdown to $2Million

Let's make history!

Something very big is happening, and I can't hold back the excitement any longer. I'm on the edge of making Stampin Up history, and I would love for you to be a part of this journey with me. I have (very) recently become the highest seller in Stampin' Up's 30 year history, and am very close to hitting $2,000,000 in personal career sales with Stampin Up. A milestone that has never been hit before. This milestone could not be possible without the support of my customers over the past 14-1/2 years. Every sale, big and small, has been a part of this event in the making. Whether you are a customer, a Stamp It Group member, or a fan, your support is appreciated. I'm so grateful for everyone who's been a part of the past 14-1/2 years. My online class viewers know, I love to "spread the love" and give back.


CARD: Life is so Much Better Card from the Patel Palette Series – Part 5

CARD

Today's card is part 4 in my series on the Stampin Up Petal Palette stamp set and Petals & More dies. This is another black and white beauty, with a splash of Bermuda Bay. Tip: use the new Stampin Blends Alcohol Markers to color Rhinestones (and other embellishments) to match the project. How do I make it? Stamp the flower image and words on Whisper White scrap. Color (4) Rhinestones with Bermuda Bay Stampin' Blends Alcohol Marker. Using the Big Shot Die Cut Machine: Cut the flower and 2 circles (black and white words). Assembly: Assemble the card with Snail Adhesive, using Dimensionals on the circle panel and the flower panel.

BLOG HOP & GIVEAWAY: Triple Time Technique with the Petal Palette Bundle – Part 4

PHOTO & BLOG HOP

Welcome to my Stamp It Demonstrator’s Group Valentine's Day Theme Blog Hop. We’re all really excited to unveil our projects, and announce a new contest give-away (below). To continue on your journey through our projects, simply use the BLOG HOPPERS links below. My share for today's blog hop is a set of cards featuring the "Triple Time Technique". I'll show you how to create the 2 different styles (side aligned and center aligned) on today's video. You can download the measurements and supply list on the free pdf. Both cards use all of the same supplies, and feature techniques with the Real Red and Old Olive Stampin' Write Markers. Today's Techniques Include:
  • Triple Time Technique - Center Aligned Card
  • Triple Time Technique - Side Aligned Card
  • Stampin' Write Markers - Line Art Coloring
  • Stampin' Write Markers - Direct to Stamp Coloring
Today's card set is also Part 4 in my series featuring the Stampin' Up Petal Palette Stamp Set.

CARD: Best Wishes Beautiful Rose Card from the Patel Palette Series – Part 3

CARD

Today's card is part 3 in my series on the Stampin Up Petal Palette stamp set and Petals & More dies. Each card posted in this series will feature written instructions, measurements and supply list on my blog. This beautiful card was designed by Terri Gaines.The rose is colored with the new Stampin Blends Alcohol Markers. The background is textured with the Garden Trellis folder. The black, white and red color scheme is striking. It would would for wedding, anniversary, birthday, new house, mother's day and even Valentine's day (although I might change out the sentiment for V-day).

CARD: Life’s Better with You In It Card Patel Palette Series – Part 2

CARD

Today's card is part 2 in my series on the Stampin Up Petal Palette stamp set and Petals & More dies. Today's card is a beautiful design, versatile and great for many occasions. Think Birthday, Valentine's day, Mother's day and more.

REVEAL: January Paper Pumpkin Kit Reveal and Contest

HEARTFELT LOVE NOTES KIT

{{SPOILER ALERT}} My January "Heartfelt Love Notes" Paper Pumpkin kit has arrived and I opened it live on Facebook. The reveal and "how to" (or how no-to) video is below. Deadline to sign up for the February kit is February 10 CLICK HERE TO SUBSCRIBE

What you need to know about the Stampin’ Up! Sale-a-bration Event 2018 – Earn free stamps and more

SALE-A-BRATION DATES:

Customers: January 3-March 31, 2018 Demonstrators: December 1 - March 31, 2018 FEBRUARY 16: Watch for another set of special Sale-A-Bration items coming.

WHAT IS SALE-A-BRATION?

The biggest Stampin Up sale event of the year! Customers can earn free, exclusive products with every qualifying order. If your wish list is big, don’t miss the demo kit special. It’s the best! Need a catalog? Fill out the form on my Catalogs & Resources page to request your free Sale-abration catalog. 3 WAYS TO EARN FREE STAMPS

CARD: Thank You Card from the Petal Palette Stamps – Part 1

CARD

The Stampin Up Petal Palette stamp set and coordinating Petals & More dies are such a beautiful and versatile bundle. Today begins a new series of card ideas featuring this bundle. I'll be blogging (and Facebooking) new installments to this series throughout the rest of the week (including Saturday's Blog Hop) and into next week. Each new card in this series will feature quick "how to make it" instructions and measurements on the blog post. Along with the complete supply list.

CARD: Sure Do Love You from the Bird Banter Set

CARD

Sure Do Love You card comes from a combination of the Stampin' Up! Bird Banter stamp set and the Sure Do You bundle. Perfect for a Valentine's day, or an anniversary. The 2 parakeets are colored with the ink pads and blender pens. The heart is stamped in blushing bride ink and blended with the blender pens. The background paper is from the Sweet Soiree & Fresh Florals DSP.

CARD: Let’s Celebrate with the Sale-a-bration Party Pandas

CARD

Celebrate with the Stampin Up Sale-a-bration Party Pandas! They are so adorable, and so popular. You can get this stamp set free during the SAB (Sale-a-bration) sale when you spend $50 in my online store. The pandas ate stamped 3 times, and then cut out and layered over 2 different patterns of the Painted with Love Specialty DSP.

CARD: Cue the Confetti Card from the Picture Perfect Birthday Stamps

CARD

This "Cue the Confetti" card from the Stampin Up Picture Perfect Party Suite, is so fun, it's like a party on a card. Love the color combination, it's so bright and cheery. Perfect idea for a birthday card, but versatile enough to use for wedding shower, anniversary and other celebrations.

CARD: Hi There Stinkin’ Cute Skunk Card from the Hedgehugs

CARD

Hi there card featuring a "stinkin' cute" (pun intended) skunk from the Stampin' Up! HedgeHugs Stamp Set. The skunk image can also double as a squirrel image, all depends on how you color, or don't color, him. Here he's stamped and cut out, then layered over the Stitched Shapes circle panel with the greeting and mushrooms stamped on it. The mushrooms are stamped "tone on tone" on the real red background panel as well, then layered over the Petal Passion Designer Series Paper (DSP).

CARD: Enjoy the Simple Things from the Yay You stamps

CARD

Enjoy the Simple Things - card from the Stampin' Up! Yay You Hostess Stamp set. This stamp set is a hostess set, which means it's available free with your Stampin Rewards now through May 31 (during the Occasions Catalog). You can also redeem my Frequent Buyer Points for Hostess Stamp sets, there are more details on this on my FBP (Frequent Buyer Point) page. The background paper is a combination of the Petal Passion (black and white) and Fresh Florals (blushing bride) DSP collections. The sentiment is stamped, then cut from the circle of the Stitched Shapes Dies, layered over a Delicate Doily. The tail of the Fresh Florals banner is punched from the Triple Banner punch.

CARD: Happiest of Birthdays to You from Picture Perfect

CARD

Happiest of Birthdays to you ~ bright and cheery birthday card. Created with the Stampin' Up! Picture Perfect Birthday & Marbled Stamp Sets. The candles were stamped, then cut out with the Stitched Shapes Dies. The background is from the coordinating Picture Perfect DSP. Finished off with a bow from the Fresh Fig woven ribbon.

ONLINE CLASS & VIDEO: December 2017 Paper Pumpkin Kit, Alternate Card Set & Giveaway

DECEMBER PAPER PUMPKIN KIT

On today's live online class we’ll be making this beautiful flower jar card using the December 2017 Stampin Up "Flora & Flutter" Paper Pumpkin Kit and the Everyday Jars dies. I added a little Vellum Card Stock and Wood Textures DSP in addition to the kit. I love the way it turned out. Super fun and easy to make. Didn't get the December Paper Pumpkin kit? You can create this with the refills to the January kit which are available in my online store while supplies last. Or try some of these fun ideas substituting either the Bouquet Bunch, or the Eclectic Layers dies.